
How to Make Seamless Patterns in 5 Easy Steps! (No Expensive Software or Witchcraft Required)
- Loppy Rae
- Nov 5, 2025
- 3 min read


I used to stare at the fabrics in Joann for hours, contemplating what sort of witchcraft was utilized to achieve patterns that went on forever. Now that I know how to make seamless patterns of my own... admittedly, I still don't understand how it works. It's got something to do with math and science, I'm sure... And listen, I'm an artist, not a scholar. What matters is I FIGURED IT OUT, and now I'm unstoppable.
Now, are there easier ways to make a seamless pattern? Probably! I know there are programs out there that can do it for you. However, I'm a simple person. I like to stick with the basics. This method requires nothing more than a graphics tablet and basic knowledge of your art program (cropping and alignment, really.) I'm using Medibang Paint Pro! This is the program I'm most familiar with, but you can find the same tools in almost every other program.
When I first started designing patterns, I made a lot of simple designs: just various elements patched together. My Baphy blanket design is made with this method! Once you get the gist of how seamless patterns work, you can start challenging yourself with more complex designs (like my gummy guts pattern at the end of this post!)

Whether you're an artist who sells their work, or just a hobbyist looking for a fun project, learning how to create your own seamless patterns is a useful skill, and easier than it looks! You just need a little bit of technical skills with your program of choice, an idea, and some patience.
Sketch Your Pattern!

Start with a square canvas, using at least 300 DPI if you're setting the pattern up for printing. I'm using a 2000x2000px canvas, which will then be divided into 1000px quadrants. Concentrate all of the elements of your pattern towards the center of the canvas. Don't touch the edges of your design! We'll fill in the gaps and blank space in the next few steps.
For your first pattern, keep it simple. Once you're more comfortable with the process, you can start challenging yourself. For now, we're just getting familiar with how tiling works!
Line & Color

Once you're happy with your sketch, line and color. I recommend using solid colors with your first few patterns. The more comfortable you get with making patterns, the more you can experiment with painterly techniques! I like to work with as few colors as possible. Avoid gradients. Stick with solids to make sure everything connects and blends!
When you're finished, save a backup of your layers. This way, you can easily fix any hiccups that may pop up, or create additional colorways. After you backup your layers, flatten the image and save it as a separate file.
Set Up the Tile

Here's the technical part: bear with me, you can do this. We're going to divide our pattern into four even quadrants. Crop the pattern into four equal quadrants. Since I'm using a 2000x2000px canvas, each quadrant will be cropped to 1000px.

To make our tile seamless, we're going to flip each quadrant to the opposite side of the canvas. The top right will become the bottom left. The bottom right will take the place of the top left. So on, and so forth! I recommend naming your layers, just so you can stay organized. Refer to the cheat sheet above if you start to get lost.

Fill in the Gaps

Once your pattern is set up, the edges of the canvas are now in the center of the tile. You'll probably notice some unsightly gaps. You can take this opportunity to connect everything or add little doodles and space fillers! I added another splatter (and then a screen tone later on) to jazz things up.
Test & Tweak!

That's it, really! Now all you need to do is test your pattern. The edges should connect seamlessly, creating an infinite pattern. By testing out the repetition, you can balance it out and adjust it further until you're satisfied!
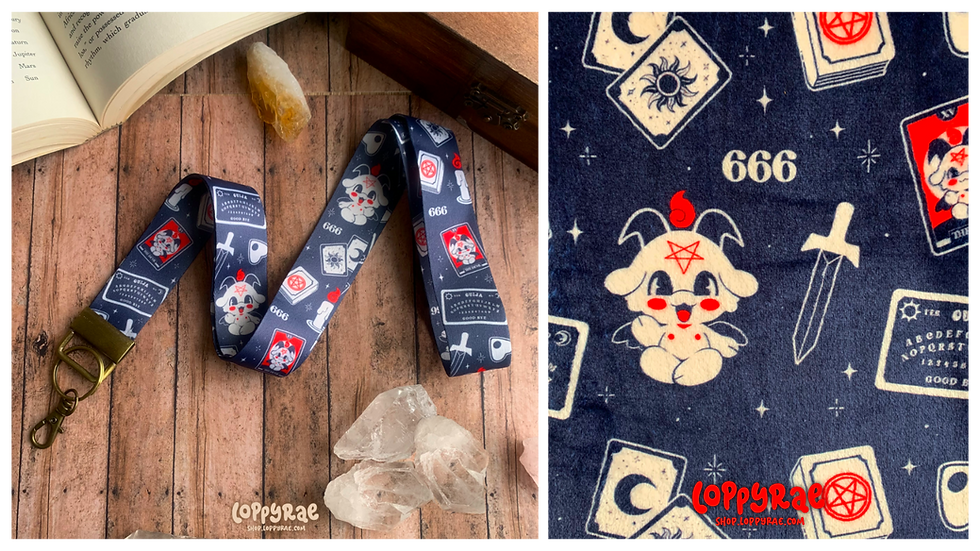
YAY! Now that you've made your very own seamless pattern, the options are endless. Repeating patterns can be used for plenty of things: from desktop wallpapers to physical fabric which can then be made into pouches, lanyards, garments, etc! Designing fabrics is a great way to bring your art to life. I've designed many in the past, including my popular Baphy blanket design which I pictured above!


If you make your own pattern, I'd love to see the results! Are there easier ways to make patterns out there? I'm sure. But this method has helped me create numerous patterns and hasn't failed me yet!
Comments